Domestic water heaters - gas water heaters are used in old high-rise buildings and private houses for the preparation of sanitary water. Their parts and assemblies tend to wear out like any other equipment. Most often, the membrane of the water reducer fails, which you can change yourself.
We will tell you how to replace the gas column membrane. In the article we proposed, the steps for preparing for replacing the membrane are described in detail, recommendations are given for its selection. Based on our advice, you will be able to monitor the operation of the gasman or restore the water heater’s performance yourself.
About gearbox and diaphragm location
A device called a water reducer is part of almost any gas heat exchanger design.
This part may have a different configuration depending on the model of the water heating apparatus, but the principle of operation of such devices remains unchanged.

The gas column reducer where the membrane is located: 1 - water inlet; 2 - rod head and stuffing box; 3 - stock; 4 - ball valve; 5 - water outlet; 6 - nozzle; 7 - plugs for draining water from the internal areas of the device
The water reducer mounted on the gas column serves to stably maintain water pressure directly in the heat exchanger system of the water heater. Due to the uniformity of pressure, a uniform flow is ensured, which means the same uniform heating of the liquid.
Part of the gearbox, contributing to the smooth regulation of pressure, is a rubber membrane. This component of the gearbox, made in the form of gaskets usually based on technical rubber, has the shape of a circle. It is installed inside the gear housing.
Due to the long-term operation of the water heating equipment, being constantly in motion, the membrane gradually wears out. Wear of technical rubber in individual places leads to gusts of material. Accordingly, the function of regulating the water pressure ceases to act according to the specified algorithm.

The prototype of a classic membrane based on technical rubber. The shape of the plate is round, the surface has a characteristic feature - the convex central part. Similar accessories are used on most gas stoves.
In such cases, it becomes inevitable to replace the rubber membrane of the gearbox in the gas column, because the water heater is not working properly.
The quality of heating sanitary water decreases sharply, and in other cases the column simply cannot be included in the work. Lost comfort for the user.
Gearbox Replacement Steps
Based on the rules of servicing gas equipment and precisely following these rules, the implementation of any installation, locksmithing, and also work related to power supply is the prerogative of gas service providers, in particular, the local gas service company.
What you need to know before starting work?
In other words, it is forbidden for owners of gas columns to perform work on gas equipment on their own. And even considering that the water reducer is theoretically not related to the gas system, it is also forbidden to disassemble this part of the structure and change the membrane with your own hands.

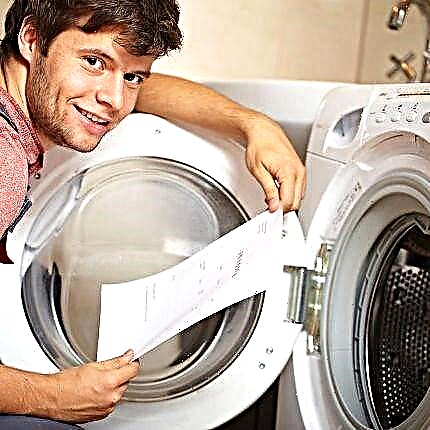
Maintenance of a gas water heater by a specialist. According to the rules of service, any service or repair work is carried out only by representatives of specialized companies
Sometimes the desire to do everything yourself, without practical experience in performing this kind of work, can turn into disastrous consequences. As evidenced by the numerous accidents associated with domestic gas equipment.
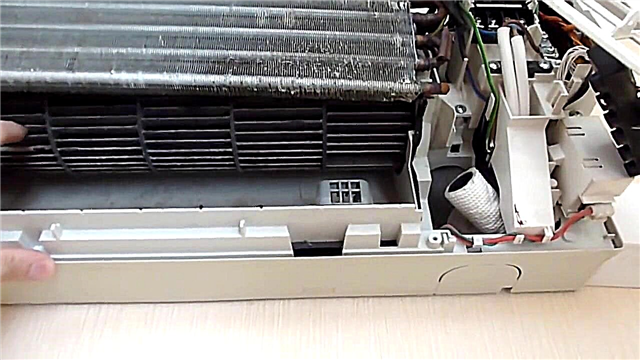
However, premature wear of the membrane and other pressurized water heater components can be prevented by timely cleaning of the equipment with your own hands or by the gas service representative.

A bitter example from life when, due to self-repair of a column, a gas explosion occurred. As a result, the destruction of a significant part of a multi-storey residential building. And there are many such cases annually
Often there are masters who are ready to independently change the membrane of the gearbox on the gas column. Moreover, to perform such an operation, in fact, is not difficult in the presence of locksmith skills.
Do this easy job as follows:
- Using the documentation or by opening the column housing and examining the internal contents, determine the brand (model) of the installed gearbox.
- Based on the technical information received, they acquire a new membrane on the market.
- If the equipment is imported, you may need to purchase a membrane only on order.
- If there is a membrane, they shut off the gas supply to the equipment, close the tap for supplying cold water from the central heating system.
- The contents of the gas heater heat exchanger are drained using a service drain valve, the location of which is determined according to the documentation.
After these operations, you can begin to dismantle the gear unit. However, one should not rush here. Work must be done carefully, carefully so as not to damage other closely spaced parts of the gas column.
Gearbox dismantling and disassembly
The water pressure reducer has inlet and outlet nozzles. Actually, thanks to threaded union connections, the device is mounted inside the gas system, directly on the water flow line.

Two positions for dismantling: 1 - pipe nut on the inlet pipe of the pressure control device; 2 - pipe nut on the outgoing pipe. Drain plugs should also be used.
Therefore, to dismantle the device, it is necessary to unscrew the two union brass union nuts on the pipeline. But before doing this work, it is recommended to unscrew one or both plugs on the drain branches of the gearbox, which are located under the poppet body.
The nuts should be loosened smoothly, while simultaneously holding the device from possible rotation. The mechanism of the device has a stem regulator in contact with another part of the gas column. On some models, the stem head is fixed with a screw. This point should be taken into account and, if necessary, loosen this screw.

Nuts for fastening to the pipeline are turned away. It remains to release the fixing screw that presses the rod head. In the picture, this position is marked with the number 3
Dismantling may be accompanied by leakage of residual water. It is recommended to stock up on comfortable, large collection utensils.
Brief membrane replacement instruction
The dismantled pressure regulator will need to be disassembled to get to the rubber (silicone) membrane. The disassembled part looks like a plate.

Two halves of the disk-shaped housing of the pressure control device, inside of which the membrane is located. Now the defective accessory is easily removed and replaced with a new one
Disassembly / assembly sequence:
- unscrew the fixing screws on the top of the plate;
- gently fork the plate with a flat screwdriver;
- remove the defective membrane;
- install a new one;
- articulate half a plate;
- fasten the joint with screws in a circle.
The correct location of the membrane on the gear plate is determined by a special “key” recess or pin, which, in turn, is located on the radial edge in the same row with the holes for the mounting bolts.
It is necessary to combine the “key” of the membrane with this recess before joining the halves of the plate and screwing in the screws.

The same pin on the housing of one of the halves of the housing, thanks to which the membrane is precisely fixed in place. On the accessory there is a hole for landing on the pin
The moment of screw fixing screws is a traditional action. However, it should be borne in mind the uniformity of the constriction of the parts of the gearbox. Technically competently, the puff is done cross-wise. That is, four screws located one opposite the other are tightened first, and then all the others are tightened.
The assembled gearbox, equipped with a new diaphragm, is replaced in the reverse order. Carefully insert the rod into the tube of the regulating device, level the device to the level of the water pipes. Then manually screw the nuts on adjacent sections of the pipe.

The picture shows a uniform distribution of the tightening torques of the screws when articulating the two parts of the housing. It is necessary to adhere to this condition in order to avoid future leakage of water through leaks.
As a rule, pipe connections include gaskets and their proper installation. This moment must be foreseen when installing the gearbox at the installation site. Then it remains only to tighten the fastening nuts, applying a little effort and do not forget to tighten the drain plugs under the plate.
Membrane Shapes and Materials
The design of gas columns is diverse. Accordingly, a change in the arrangement of the pressure reducing valve is not ruled out. Therefore, the existence of variously shaped gear membranes is also seen as an obvious phenomenon.
If the product is considered to be a round product, which can often be found when disassembling the valves of domestic gas columns, imported devices are often equipped with "exotic" ones.

The so-called exotic version of the rubber membrane. As a rule, most often products of this kind are found in imported designs
One of such examples is gas water heaters of a well-known foreign company producing household appliances under the Electrolux brand. Many models of equipment of this brand are equipped with figured membranes in the image of the G8.
Apparatuses of foreign company Vaillant are somewhat less popular compared to Electrolux, but they also stand out from the entire range of domestic gas columns by non-standard manufacturing of gear membranes. When disassembling their valve, there is a chance to collide with a membrane membrane.

Another “exotic”, not so pronounced figuratively and very slightly different from the classics, but nonetheless. Such accessories are also used on foreign devices.
For the sake of objectivity, it should be noted: products of a non-standard shape show finer regulation of duct pressure, but in terms of long-term operation, they are often inferior to standard ones. Often the degree of durability is determined by the quality of the material.
In practice, it is noted that silicone membranes last longer than rubber ones. However, for silicone, an important criterion is the careful filtration of the network water. Even a small amount of sand or rust that falls into the area of the silicone product, dramatically reduces the life of the material.

The manufacture of the membrane using a relatively new material - silicone. According to the quality of work, the accessory in this design is characterized by more expressive parameters, compared with technical rubber
Technical rubber is less sensitive to the effects of suspended particles, but for the most part “suffers” chemically insufficient stability. That is, if the composition of the water to some extent has an aggressive component, under these conditions products from technical rubber usually do not last long.
Repair of membranes of geysers
The desire to save on everything makes some users resort to such a virtual replacement technique as repairing a defective membrane with their own hands.
It should be noted right away: this occupation is probably interesting for a home jack of all trades, but, from the point of view of service, it is absolutely irrational and meaningless.
They try to repair the membrane of gas columns in different ways:
- by puttying with silicone sealant;
- with the help of various types of adhesives;
- pentelast;
- installation of miniature patches;
- and even masking tape.
The activity of such a "repaired" part lasts, as a rule, no more than 1-2 days. After that, problems begin again, and often even more aggravated.
Repair of membrane plates of gas columns, especially with their own hands, in any case fails. Proven in practice more than once. So, changing “sewn for soap” is not recommended, unless a purely research interest is visible in this matter.
If you can’t restore the functionality of the wall-mounted water heater, you will have to buy a new gas water heater. The following article will examine the guidelines for choosing equipment in detail, which will analyze this relevant topic in detail.
The video demonstrates the personal experience of one of the owners of the heater - that is, a do-it-yourself repair of the water pressure regulator. In particular, all repairs come down to replacing the membrane. We remind the audience once again: independent repair of gas systems is unacceptable!
It is easier to find and buy a new membrane for a gas column, replace this accessory according to the instructions described above and sleep peacefully. Moreover, the replacement, in most cases, does not require significant financial costs. On average, 200-300 rubles are enough to buy a complete accessory.
Please leave comments, post photos on the topic of the article and ask questions in the block below. Tell us about how to choose and change the membrane in a gas water heater. Share useful information and technological nuances that are useful to site visitors.